Tuesday, February 5, 2013

Independence Day bracelet/Indian Flag bracelet:


Materials
Any beads
String (elastic would be best)

Instructions:
1. Tie a knot on one end of the string. Thread the beads onto the string. When you are done tie a secure knot.
2. In this bracelet i used a small rectangular strip of paper. Glued flag colored foam strips (saffron, white and green) on top.Don't forget to put a blue chakra in the center. This was used as the center bead for the bracelet.

 Will post American flag craft soon

Sunday, February 3, 2013

Valentines card


While making mini duck craft i got an idea to make this cute ducks valentines card.Isn't it cute?
Valentines Card

Materials:
Card stock any color (i used white,red and black).
Glue.
Double sided tape.
Yellow and orange construction paper for the ducks.

Instructions:
1. Take a white card stock(8x4). Fold it in half.
2. Cut the red paper into a square slightly 1/4th inch less than the white card .Glue it on the  top of white card.

3. Make 2 mini ducks and glue them on black paper which is slightly less than red paper.
4.Now glue this on red card stock.

Friday, February 1, 2013

Turkey Headband

I found this online while doing research for a Thanksgiving craft.Very simple.
Turkey headband
Materials:
Brown construction paper/brown bag
Red and yellow construction paper for turkeys wattle and beak.
Any color paper for feathers and wings
Googly eyes/white pompoms


Instructions:

For the band
1.Cut 2"x(16"-18") strip of brown paper(measure your kids head)make like a band.Use glue or staple to hold the edges.
2.Cut 3 feathers from different construction papers glue them on the back of the band.
3.Glue the wings on each side of the headband.

For the face
1.Glue the googly eyes(You can just use white and black paper).
2.Cut a small diamond shape from yellow construction paper for the beak.Fold it into half like a triangle and glue.
3.Cut a rounded "L"shape for the turkeys wattle,glue it inside the triangle.
4.Glue turkeys face to the headband

You can ask kids whom they are thankful for and write on the pre-cut construction paper feathers like this.


Paper wristbands

Kids will have lot of fun while coloring these paper bracelets.
Paper bracelets
Materials:
Card stock/construction paper
Punch hole
Ribbon or yarn to tie the ends
Coloring pencil/crayons
Paper flowers/foam or glitter for decoration

Instructions:
1. Cut a strip from the paper to fit your kids wrist. Width should be 1.5”.
2. Make them use color pencils or crayons to design their band (make a outline design for them).
3. Punch holes at the end. Tie the band around your kids wrist using a ribbon.

Cut strips from the design paper like this and give strips to your kid and ask them to color.They will have fun.

Paper lantern

I made these in school when i was a kid.Did you?

Materials:
 

Scrap-booking paper/construction paper(i used A4 size paper)
Scissors
Ribbon
Tape/Glue

Directions:
1.Fold a piece of paper in half( length wise).
2.Starting at the fold cut a straight line (Dont cut all the way till the end)Leave at least 1 inch,continue to make parallel cuts(make sure they are evenly cut).
3.Once all the strips are cut,open the fold(You can color or decorate your lantern at this point).
4.Now roll the paper into a tube shape.Staple or glue the edges together.
5.Use a strip of paper or ribbon as a handle.Staple the handle on the top side of the lantern.

Tip :
Use a ruler and make straight lines if your kid is doing the lantern.
Variations:
You can use these as table lanterns with LED tea lights.

Quilled flower card

These flowers can be made even without a quilling tool.
This is a great first cutting project for kids since they practice the hand motion of opening and closing the scissors.


Materials:
Any colored paper/construction paper
glue
card stock for making card
scissors

Directions:
1.For the center of the flower:
Cut a thin strip of paper with scissors.Roll it between your fingers to form a circle and glue the end.
2.For petals:
Take 1 inch wide long strip.Make minute cuts like this.

Now take the rolled center bud,roll the petals strip around the bud,glue it at the end.Simply press with your thumb .
Make a "s" shape design with a thin strip for creeper.


You can use these flowers on cards,to make photo frames,in any kind of decorations(like i used them to decorate my blog :-)

Mini paper duck

This is a very simple duck craft for toddlers from www.simplekidscrafts.com.I like all the simple crafts,so tried it.

Materials:
Card stock any color (i used white,red and black).
Glue.
Double sided tape.
Yellow and orange construction paper for the ducks.


Directions:
1.Cut an oval or circle for the ducks face out of yellow construction paper.
2.Glue eyes to the face.
3.Cut a small diamond shape from orange construction paper for the beak.Fold it into half like a triangle and glue.
4.Draw two dots on the beak.
5.Mini duck is ready.


When i was doing this i got an idea to make duck headband.Will post that soon.

Foam bracelets

These bracelets takes just minutes to put together and are comfortable around your kids wrist.I'm sure every little girl would love these.

Materials:  

Foam sheets
scissors/decorative scissors
ribbon
Velcro
thread/ribbon/lace/Velcro
decorating items like flowers, beads ,glitter,alphabets

Instructions:1.Cut strips of foam(measure your kids wrist,these should fit loosely around kids wrist)
2.Punch hole at each end.Attach lace/thread  to tie the bracelet on.Decorate with embellishments.
3.If using Velcro glue 2 opposite pieces to the ends.One on the back and one on the front of the band.

Variations:
1.You can place two pieces of foam on top of each other.The top one should be slightly less in width than the bottom one.
2.You can sew ribbon on the foam and also handmade beads etc.
You can create as many variations as you want.
Foam Bracelets
 

Wednesday, January 30, 2013

Tissue paper flowers

Making tissue paper flowers is an easy and creative way to spend your time.
Colorful tissue paper flowers


You will need:
Tissue paper
scissors
Yarn/thread/pipe cleaner

Directions:
1.Cut the tissue paper in half or cut in quarters.
2.Lay them on top of each other .
3.Then fold these in an accordion fold. (Fold your paper about 1 and half  inch wide,then flip it over and make another fold ,continue doing this until you reach the end.
4.Take a pipe cleaner or thread or wire and tie it in the middle.


5.cut the edges into petal shape.
6.Hold the flower in one hand ,now carefully open up the layers.pull as much as you can with out ripping it.Then do it on the other side

You can decorate your house with these flowers,place them in a vase or hang them..
Table cloth flowers

The red flowers above are made of dollar store bought table cloth..can you believe it?My table cloth was ripped so i used it to make these awesome flowers.

Diwali Diyas


Diya for decoration

Since diwali is the festival of sweets, fire crackers, lights and decorations…
I made pedas and decorated the wall with homemade diyas.I started this fun little homemade project with foam and glitter.


What you will need:
Foam /construction paper
Glue
Any decorating/embellishing items (beads,sequins,mirrors,glitter)


Directions:
1.Cut out diya shapes from any bright colored foam and flame shape from yellow or orange foam .Glue diya and flame .Decorate them as you like with any embellishments. You can also write Happy Diwali with glitter on them.
2.Make as many diyas as you want .Decorate the wall/door with these beautiful diyas.

NOTE:
To make multiple diyas,trace diya shape and use it to cut more.

Diwali decoration on the wall
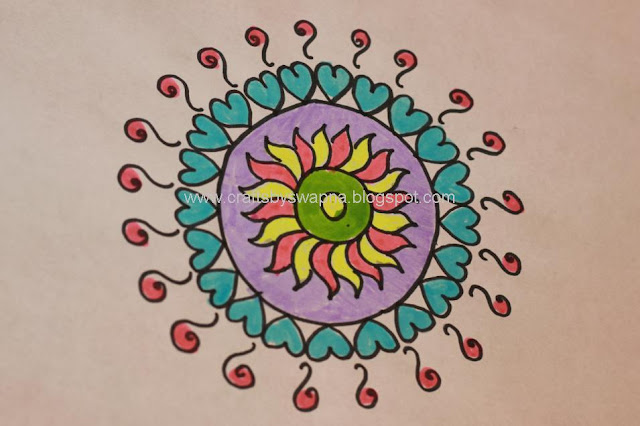
In India we decorate entrance of our houses with beautiful rangoli designs/muggulu to welcome our guests right?
Here are some rangoli designs for you.


Diwali Rangoli

Rangoli

You can decorate the entrance of your house with these beautiful rangoli designs and decorate it with flowers/petals  and diyas.
As I cant decorate it infront of my apartment here in US.i can post some pictures of rangoli designs.


Another simple rangoli design

I used Markers to draw on white paper.